
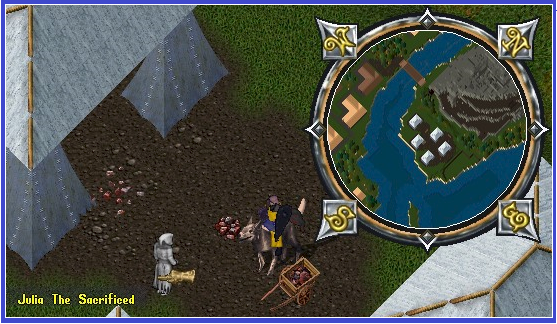
We begin our adventure in the Mining Camp outside the city of Minoc, Julia will be there waiting for you to begin your adventure!
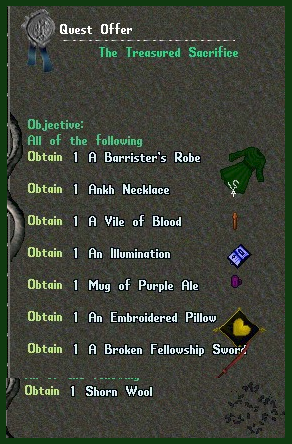
The Treasured Sacrifice
With the runes of Virtue destroyed, the Shrines of Virtue quickly fell to the Fellowship menace. The only hope to rebuild them is to restore the protective power the runes once provided. You encounter the ghost of the famed Tinker Julia who has uncovered a way to rekindle that protection and allow the Shrines to be rebuilt. In order to assist, you must accomplish two goals. First, you must collect a vial of blood from where Julia was slain to reconnect her spirit to this plane. Second, you must obtain charms from 7 other companions. With their help, the shrines can be rebuilt.
Once you accept Julias quest, speak with her again to obtain hints to locate the 7 companions.
“You must visit the companions and obtain a charm from each of them so Julia can attempt to re craft the Runes of Virtue and restore the Shrines of Brittannia!
Mariah is overcome with insanity from the tetrahedron and is resting at a healer in Moonglow.
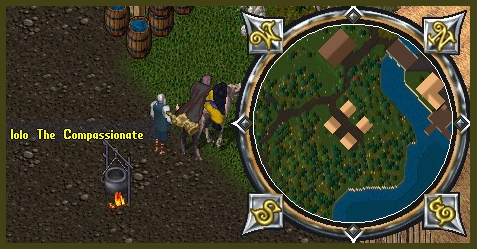
Iolo is tending to those in need at the poorhouses South of Britain.
Geoffrey is coordinating response to the Fellowship from The Hand of Death in Jhelom.
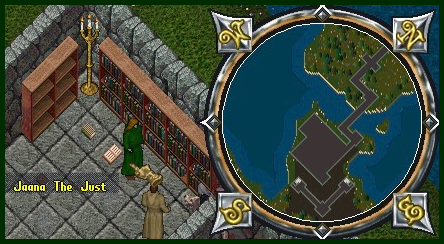
Jaana is defending those accused of theft at the Court of Truth in Yew.
Dupre is telling stories of victory at the Keg and Anchor in Trinsic.
Shamino’s spirit can be felt at his statue in Skara Brae.
Katrina is helping some simple sheep farmers in New Magincia.
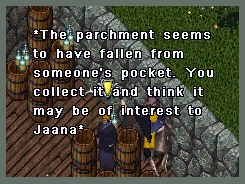
The troll still torments the bridge north of Vesper and east of Minoc near were Julia was killed.
Now that you have your instructions, lets begin our quest! Let’s go talk to Mariah first…head on over to Moonglow to find her!
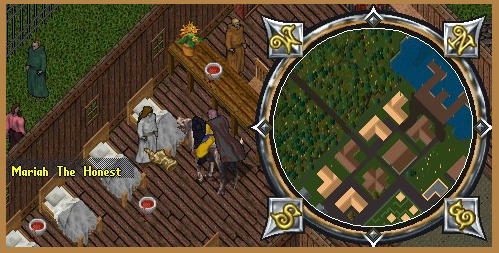
You enter the healers hut and talk to one of the healers. You are told that Mariah’s condition is dire. After utilizing mana corrupted by the tetrahedron, she has been overcome with insane and unintelligible ramblings. The healers tell you her only hope for a cure is salve made from compassion sage carried by Controllers deep in the exodus dungeon, and raw ginseng growing in the far northern forests of the continent.
Speaking to her again gives you a clue as to where you should go.
You must find compassion sage and raw ginseng before it’s too late! Venture to the Exodus Dungeon in ilshenar, there you will find Compassion Sage carried by Controllers. Raw ginseng can be found growing in the northern forests of Britannia.
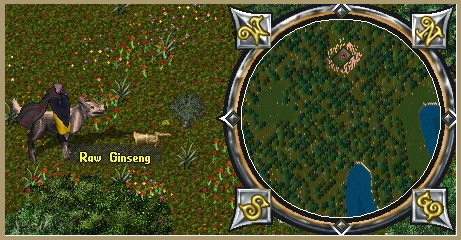
Once you have obtained the Ginseng and the Compassion Sage, return to Mariah. (The Ginseng has a 24 hour timer so be sure to get your compassion sage FIRST so you don’t run out of time!) The healers start right away on preparing the salve. Mariah’s condition improves with each passing moment. She thanks you immensely for your service during her time of need. While suffering maladies of the tetrahedron, Mariah has drafted Illuminations from the Book of Truth. She gives you one with a smile. “Be true to the origins of Britannia and you will succeed in your endeavor.”
One item down, 6 to go! Let’s head on over to Iolo in Britain.
“Greetings friend. Welcome to the poorhouse. Here we offer what we can to Britannia’s most needy. We don’t have much, but what we do comes from the compassionate donations of citizens like yourself. Can you help us? Any supplies would go a long way to making those who need our help more comfortable. Even simple things like bread, milk and shoes can go a long way to easing the suffering of those who have nothing.”
These items are easy to obtain, just go to any provisioner or innkeeper/waiter/waitress for the loaf of bread and pitcher of milk. A cobbler will sell you some shoes….then head back to the poorhouse with your items.
“You are truly compassionate! lolo takes the items you have provided the poorhouse and distributes them to the overjoyed faces of those in need. The poorhouse welcomes more and more Fellowship refugees each day. Your heart warms knowing you did right by the people of Britannia. Gazing about the poorhouse in satisfaction, a tug at your boots draws your attention down. A small child hands you a pillow.
Now that you have your embroidered pillow, it’s time for the next companion. Let’s head on over to the Hand of Death in Jhelom to meet up with Geoffrey.

“We’ve got those Fellowship killers on the run! Ha! I hope you are here to join the fight because we can’t relent for even a moment! Reports suggest the Fellowship may be attempting to train dragons down in Destard to launch a full scale attack against Britannia! We’ve got to stop them! Head down to Destard and thin the herd to keep the Fellowship from building a dragon army we won’t be able to stop!”
Time to go to Destard to kill some dragons! This quest has you kill 40 Drakes, 20 Dragons and 5 Greater Dragons…so let’s get to work! Once you have slain the allotted amount of beasts, head on back to The Hand of Death to let Geoffrey know you have completed his task.
Sir Geoffrey is quite pleased and proud of your progress. He gives you a damaged Fellowship sword as a memento of your valiant efforts!
Now that you have received the sword, it’s time to talk to our next companion, Jaana in the Court of Truth in Yew.
There has been a break in at the Yew Winery. Those who stand accused cling to the claims of innocence as mere Fellowship pawns. Jaana has asked for your help in clearing the names of the accused. You are to go to the Yew Winery and uncover evidence of the true nature of the crime and return to her so she can present the evidence to the court in an effort to clear the names of those whom she represents.
Head on over to the Winery and have a look around to see if you can find any evidence that Jaana can use to clear the accused.
Upon visiting the winery you find the space in shambles. Between the original crime and the sloppy investigation by the Royal Guard it would be easy to overlook what you’ve found. None the less you have uncovered orders given to the accused demanding they steal from the winery lest their families would be in grave danger. When you bring the evidence back to Jaana, she presents it in court and the charges are dropped. She thanks you for your help by giving you a Barrister’s Robe.
Next up, let’s head to Trinsic and find Dupre at The Keg and Anchor.
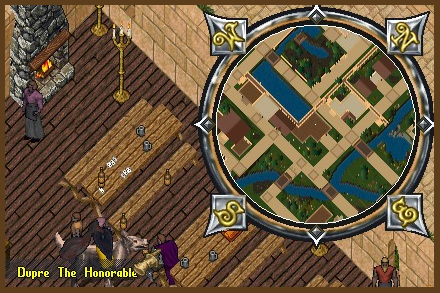
You’ve met Dupre at the Keg and Anchor. He smiles as he leans on the bar. “No doubt the realm is in turmoil…with the Shrines destroyed, virtue is sapped each day. Still, honorable combat exists between those courageous and truthful to the art to practice it. A daemon called Arcadion has challenged anyone brave enough to venture into Dungeon Shame and prove their worth in combat. Are ye up to the task? Upsetting a daemon is the last thing we need at a time like this…”
For your quest, you must travel into the depths of the Dungeon Shame and defeat an Unbound Energy Vortex. Bring friends! These deamons are not easily defeated…but once you are victorious, head back to The Keg and Anchor and let Dupre know of your victory.
Dupre looks elated as you relive the tale of your great victory with him and all those assembled in the pub. The crowd hangs on your every word and erupts in raucous cheer as you describe in great detail the killing blow to the mighty unbound energy vortex! Dupre smiles as he slides a mug of purple ale your way with a salutory, Cheers!
Your next stop is Shamino’s Statue in Skara Brae.
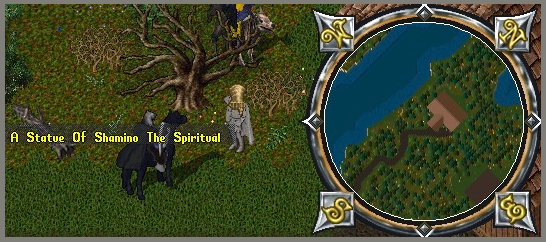
You come upon a statue of the Ranger King Shamino. Immediately your spirit is one with the statue, you know what must be done. A ranger has fallen deep inside Hythloth. Until the spirit of the ranger can be returned to the ethereal void there is great unrest in the spirit world. Without a word being spoken, you know that you must find the fallen ranger deep inside Hythloth and return to Shamino’s statue.
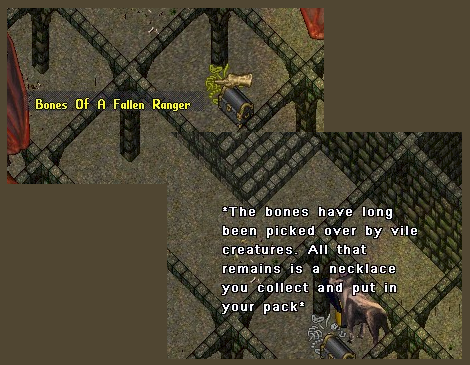
Sharpen your sword, rosin your bow and get your pets ready for the dangerous trip deep into the depths of Hythloth. Once you are in the bowls of this horrid place, search the ground for the fallen rangers bones.
Once you’ve retrieved the pendant, return to Shamino’s Statue.
Deep inside Hythloth you encounter vile horrors. Hunched daemons who barely fit inside the stone walls of the dungeon attack any who care violate their den. Despite these horrors, you prevail and recover an ankh pendant from the fallen ranger’s corpse. You’ve returned the pendant to Shamino’s Statue. As you place the pendant on the statue, a great wave of relief washes over you. The pendant is now yours and your spirit is joined with the ethereal void.
Your last stop is New Magincia to visit Katrina.

You have been approached by Katrina who tells you of a group of sheep farmers who are being tormented by Troglodytes from the Painted Caves. She has had trouble getting the guards to take her requests for assistance seriously, especially in the face of the greater perils that threaten Britannia and asks if you will humble yourself before the farmers and assist them without promise of payment so their livelihood will not be at stake.
You have pity on the sheep farmers and head to the Painted Caves to kill as many Troglodytes as you can! (50 will do though for this quest). Once you’ve completed your task, head back to Katrina to let her know.
The sheep herd is already rebounding now that they aren’t being eaten on a daily basis and the farmers appreciate your humility in dealing with a task far beneath the tactical acclaim of someone such as yourself. Katrina and the farmers are quite thankful and present you with some special wool as a keepsake.
Now that you have all of the charms Julia has asked you to get, it’s time to head back to see her. With your help, Julia has collected charms from all the companions. Your sacrifice of these powerful relics does not go unnoticed. Julia smiles a ghostly grin and you feel a warmth about the air as she begins to bind the charms to the ethereal plane.
Congratulations! You’ve completed The Black Gate and receive a stone engraved with a symbol of one of the virtues. You have made Britannia safe again and have begun to restore the Shrines.

Recent Comments