The art of absorbing, avoiding or otherwise mitigating damage using different pricinples, methods, modules and techniques.
In short, the ability to sustain enough hitpoints on your ship to prevent an inappropriate and/or untimely exit to your pod. In other words; how not to die horribly. How to not reach zero hitpoints. How to not fail. Do you really need more acronyms?
There are basically 3 ways to mitigate damage (ie. Tank) in EVE:
1. Shield Tanking
– 1.1 Active Shield Tanking
– 1.2 Passive Shield Tanking
– 1.3 Buffer Shield Tanking
2. Armor Tanking
– 2.1 Active Armor Tanking
– 2.2 Buffer Armor Tanking
3. Signature Tanking
There are other ways to avoid damage alltogether (ie. tank):
4. Cloak
5. Remote Tank
6. Meta Tanking (advanced topic)
The last method is Hull-tanking, which is too ineffective to discuss in-depth for this article. Do note that a few ships cater to this principle though. A very select few.
Alright, lets get started!
Defense Layers – what are they?
All ships in New Eden has 3 layers of defense. These are:
- Shield
- Armor
- Structure
The first layer is the shield.
Shields are an energy based defense layer that surrounds the external hull (ie. your ship). It comes with a passive recharge rate and a hitpoint number. This means that when taking damage, your shields will automatically replenish itself by a small amount. This layer also has resistances, which values depend on the ship hull you are flying. These 3 variables (recharge rate, hitpoint number and resists) can be adjusted by fitting specific ship modules across a variety of shield modules.
Once your shield hitpoints reaches zero, the next defensive layer to step into effect is your armor.
The second layer of defense is your armor. Armor hitpoints and resistances are based on your ship hull and can be adjusted as with shields, while replenishing the hitpoints only can be done with an armor repair module. Armor hitpoints are for all intents and purposes, a static value.
Once your armor hitpoints reaches zero, the next defensive layer steps into effect; Structure.
The third and final layer is your Structure. Structure or Hull hitpoints can be adjusted as with the resistance on it – although keep in mind that without resistance modules your hull does not have structure resistance values. It can also be repaired by a repair module. Structure hitpoints are also a static value. While there are in fact hull repair modules, these are only really effective to avoid repair bills on your ship.
In the beginning of the game, armor and hull repair modules can be a wise investment after you’ve run your missions in order to save some ISK on repair bills.
Once the structure hitpoints reach zero, your ship will explode and you will be placed in your Pod. Your ship has been destroyed. No if’s but’s or why’s are nessisary. You have failed. This is an experience you will encounter many times in EVE Online. Dealing with defeat is part of the game. Thankfully, defeat is also what fuels industry and keeps everything going in a never ending circle. If you regularly do combat, its often a good investment to insure your ship, especiall in the early days of your career.
Finally, all 3 layers can be remotely repaired by another ship that has a remote repair module fitted. Incidently, this is also the intended design of the line of ships that are known as Logistics but this is also the role for some Capital Ships. In a pinch, stations can also repair damage to your armor and hull at a cost.
Shield Tanking – How do I shield tank?
There are three ways to effectively tank with shields. Keep in mind that most will increase your signature radius of your ship, making you easier to hit and subsequently take more damage.
Active Shield Tanking
The modules that allow for active shield tanking are used in the mid-slots of your ship. No other places can these be fitted, so primarily you want to look at ships that has at least 1 mid-slot and preferably enough to also fit shield resistance modules or shield extenders. Alternatively, you can fit rigs that help boost resistances.
Relevant modules for active shield tanking are as follows:
- Shield Booster (replenishes shield hitpoints)
- Shield Boost Amplifiers (increases replenished booster hitpoint amount).
- Shield Hardeners (increases shield resistances)
- Shield Resistance Amplifiers (increases shield resistances)
- Shield Extenders (increases shield hitpoints)
- Shield Rigs
For PVE, you’ll want to add at least 2 mission specific resistance modules in addition to your shield booster (get over 75% resistances on the two primary damage types in the mission). For PVP, you’d usually want to look at modules that increase all resistances while also plugging your resist hole (usually EM) with a rig as well as being able to fit propulsion and tackle modules.
Many PVP fits lack resistance modules because these go into the invaluable mid-slots that are used for tackle and prop modules. In this case, you simply can’t have both without (at the very least) considering Rigs.
Passive Shield Tanking – The PVE credit card.
The basic premise of passive shield tanking is to increase the replenished hitpoints of your shield to a degree where the replenished hitpoints of your shield will be higher or similar to the incoming damage.
Due to the nature of Shield Recharge values it is possible to increase the number of hitpoints your hull will naturally (passively) replenish. Under ship attributes (shield category) – you will be able to see the time it takes for the ship to fully replenish your shield to 100%. On the Drake, this attribute is 1400 seconds to replenish 5.469 Shield Hitpoints. Different hulls, different shield recharge values.
In order to adjust the number of hitpoints that is passively replenished by your hull you can either increase the shield hitpoints, or decrease the shield recharge time. In the case of the Drake, the replenished hitpoints comes out to (5.469/1400=) ~3.2 hitpoints per second.
If I increase the shield hitpoints by 1,000 hitpoints, my hull will now replenish (6.469/1400=) ~4.62 hitpoints per second. If I was able to fit a Large Shield Extender, I’d add upwards of 2.500 shield hitpoints, increasing the shield recharge rate to 5-6 hitpoints per second. Based on the initial 3.2, thats a large increase in recharge rate without actually adjusting the value that has to do with recharge time.
The other way is to decrease the time it takes for the hull to replenish the shield; recharge time. By adding a single shield recharge module I can cut this down by 15%. Adding more still provides a boost, allthough this is diminished to the point where 4 modules are irrelevant due to diminished returns.
At maximum you should fit 3. This goes for any modules, really.
At 3-4 modules, any other module you will add that will provide a bonus to something else (+10-20%) is more usefull than adding a 3rd or 4th module for a miniscule (0.5 – 3%) bonus. Even with specialized fits, its usually a good idea to keep an eye on othe entire perspective. If you’ve fitted more than 4 identical modules, you need to step away from the keyboard and rethink it because its a solid indicator that you’ve lost the perspective.
Passive Shield tanking is done primarily by fitting these modules:
- Shield Power Relays (increases shield recharge rate while lowering capacitor regen)
- Shield Rechargers (increases shield recharge rate)
- Shield Extenders (increases the shield capacity/hitpoints)
Add to that, the resistance modules that is often required in missions and you’ll find that you’ll need alot of available midslots to make it effective. This limits the number of ships that can pull this off effectively and also has a tendency to reduce DPS.
Shield Buffer Tanking
This principle is simply what you do in PVP primarily and is based on the principle of having as many hitpoints as possible to allow for longer engagements and the most impossible of damage volleys (what is also known as alpha’s / spike damage). You will also find that Bait ships have a large buffer to allow the friendly fleet enough time to warp to the position of the bait ship and start repairing it and engage the enemy.
If you are doing any kind of hauling in high security space, buffer tanking is the best (read: only) way to prevent a ship loss from happening untill Concord arrives on the scene to kill your attackers.
In PVE this principle is used for high-end content to allow for logistics ships to lock on to you and start repairing you. For example, during Incursions or Wormhole Anomalies where Logistics and Capitals are there to keep you alive. Incidently, during these PVE encounters you will usually find that its also the place where being “primaried” means taking the aggro from the entire pocket or at least many ships that deal a lot of damage. Self repairing these damage volleys is usually impossible to pull off successfully. Or at least very hard to do without fitting something expensive and exotic (which is usually counter productive since it opens up the option to kill you for your loot).
You’ll just need Shield Extender modules or Shield Rigs to fit a shield buffer tank. To increase the Effective Hitpoints on the buffer, fit more resistance modules. Plug the holes.
Armor Tanking – is it really viable?
While shield tanking gives you a bit less micromanagement and a bit more buffer, armor tanking is a very viable and often preferred way of tanking in high-end PVE and PVP. This is because armor tanking frees up midslots you can use for more utility modules (like tackle modules or EWAR). The Maller is one of the most obvious bait ships around, and while even as a buffer tanked fit these ships can take a beating due to their resistance bonuses. The Heavy Interdictors that are based on the Maller hull is propably one of the best around for Capital Ship tackling even though the Devoter starts out with an armor hitpoint pool of just little over 2,000.
Active Armor Tanking
As with active shield tanking, you’ll need a repair module. But while the shield repair modules go into the midslots, the armor repair modules are low-slot based. This makes it easier to distinguish ships from other in terms of tanking ideology. Many midslots = shields, many lowslots = armor.
Active Armor tanking modules and Active Shield tanking modules cost capacitor energy to run, so be wary of neuting ships as they can break your tank.
The nessisary modules to sustain active armor tanks are:
- Armor Repair Module
- Resistance modules
- Armor hitpoint increase modules
- Armor repair amount/cycle time Rigs
Because of the requirement of capacitor and the nature of active armor tanks, you could also consider a Capacitor Booster since those are midslot based modules. This combination is one of the things that has made the Myrmiddon so popular in solo PVP. It has a bonus to armor repping, and midslots enough to have tackle modules and a capacitor booster feeding the tank. Its exceptionally difficult to break the Mymiddon tank as long as its cargo bay is full of capactor booster charges. As a result, people often underestimate the ship thinking the tank is fickle (low on hitpoints) and easily breakable.
For mission running, the Gallente and Amarr ships are often pitched into Active armor tanking and does at great job at that.
Buffer Armor Tanking
Similar to Shield Buffer tanking, this principle is simply the way to increase armor hitpoints on your ship. Its often used as a PVP tanking method due to armor modules being low-slots and pvp mods being midslots.
The similarity to shield buffer tanking makes the high-end PVE viable activities for buffer fit ships. It allows for logistics ships to help out the buffer fit ships and compared to shield buffer tanking isn’t reliable on many midslots being available on the hull. In turn this means that the ships fitting the buffer armor can slide into other roles (ewar/utility), making them more appealing for high-end content due to versatility.
Primary modules are:
- Armor Hardeners
- Armor Plates
- Energized Membranes
- Resistance Plating
- Armor Rigs
- Damage Controls
- Implants
For missioning you’d have logistics on grid to help repairs and so you’d focus on chosing resistances against NPC’s and buffer hitpoints to increase response time of the logi pilots. If you are up against ships with neuting capacity, remember to chose modules that are unaffected by loss of capacitor – such as membranes, plating or rigs. If you encounter Sleeper NPC’s regularly, do note that loss of the entire capacitor is not uncommon, which will cause all active modules (such as armor hardeners) to shut down.
For PVP depending on role you could do similar to avoid an alpha breaking your tank. Recon ships tend to be fickle though, no matter the tanking method and to some extent rely on Nano/Meta Tanking methods rather then shield/armor tanking. It is therefore important as a Recon pilot to stay out of web/scram range while staying within repping range of the logistics.
Do take note of the differences between hardeners, membranes and platings:
Armor Resistance Modules Overview
| Name | Powergrid Usage | CPU Usage | Capacitor Usage | Resistance Types | Resistance Bonus |
| Armor Hardeners | 1 MW | 16 – 36 tf | 10 – 46 GJ | EM / Th / Kin / Exp | 50% – 64% |
| Energized Specific Membranes | 1 MW | 20 – 34 tf | 0 GJ | EM / Th / Kin / Exp | 32,5% – 46% |
| Energized Nano Membranes | 1 MW | 24 – 40 tf | 0 GJ | All | 15% – 30.3% |
| Specific Platings | 1 MW | 0 tf | 0 GJ | EM / Th / Kin / Exp | 20% – 37% |
| Nano Platings | 1 MW | 0 tf | 0 GJ | All | 8% – 25,75% |
Small ships can easily fit Platings and with some luck either membranes or hardeners. With smaller ships you also have to consider that some types of resistance modules outperforms others that may not be obviously apparent.
Signature Tanking – Whoa, what was that?
For each ship, there is a signature radius. Small ships have a small signature radii, large ships has a large signature radii. The signature radius range from 30 meters (drones/frigates) to over 15 kilometers (Titans) and is used in calculating successfull turret tracking, scanning results, target lock timer and for missile damage calculations.
For the purpose of tanking damage, we’ll look at two principles that has to do with the signature radius and how its used in damage calculations.
Speed tanking refers to the art of moving faster than the tracking speed of your oppenents turret, making him unable to hit you. This is realistically achievable in many ships, allthough you do get a bonus to this the smaller the ship you fly in.
Once your ship achieves a higher angular velocity than the turret can track, you’ll avoid damage. There are two ways to logically achieve this:
- Long orbit: Go insanly fast using a prop module on a small ship.
- Short orbit: Decrease orbit range to the point where the turret can no longer track because youre too close (hull hugging).
Sometimes a close orbit is preferable (for heavily tanked ships), while as an interceptor you’d be too fickle to want a short orbit and instead need to be outside of web/scram range.
Using the long orbit method, you’d be looking at the following modules:
- Microwarpdrives
- Overdrives
- Nanofiber Internal Structures
- Astronautics Rigs
- Implants
Keep in mind that due to diminishing returns there is little to no benefit from a 3rd or 4th module but primarily you want to increase velocity, secondly increase agility/inertia and thirdly decrease signature radius.
Using the short orbit method, you’d be looking at the following modules:
- Microwarpdrives
- Afterburners
- Nanofiber Internal Structures
- Inertia Stabilizers
- Astronautics Rigs
- Implants
Short orbits focus on increasing inertia/agility, secondly reducing signature radius and thirdly increase velocity. Without an agility increase, using a short orbit means pushing your ship outside the intended orbit range. You can test this effect by orbiting a can or a small ship. By increasing your ship speed, the orbit becomes wider then you have asked your ship to effectively orbit. Do not try this if you fly paperplanes as you’ll be inside web/scram range. Remember that having to orbit in web/scram range means you could potentially risk taking more damage, so fit accordingly.
Cloak Tanking
Of course, this method relies on you not being targettable while still being on-grid. Being cloaked means that you can observe, and nothing more. Some ships can fit a covert ops cloak, which means they can warp while cloaked and others aren’t able to.
Still, if you are in a hauler and land on a gate camp, those battleships at 100km won’t be able to hit you unless you get decloaked by another object within 2km range or targetted before you get to cloak.
There are no reasons for fitting a cloak in combat since a cloak won’t allow you to escape combat that has allready been initiated. Its a preemptive tool to prevent taking damage in advance. If you do not use it properly or fail to use it, there is a very valid risk of you, dying.
In other words; Use it = don’t die. Don’t use it = die.
Remote Tanking
When roles were assigned during the inception of the game development, the traditional MMO trifecta of dps, healer and tank was also considered.
The healer of EVE Online are the Logistics ships line providing remote repairs or other support to other ships. In fleets, or in high-end PVE/PVP you will in fact usually have pilots that can fill the role of a Logistics pilot to keep everyone alive.
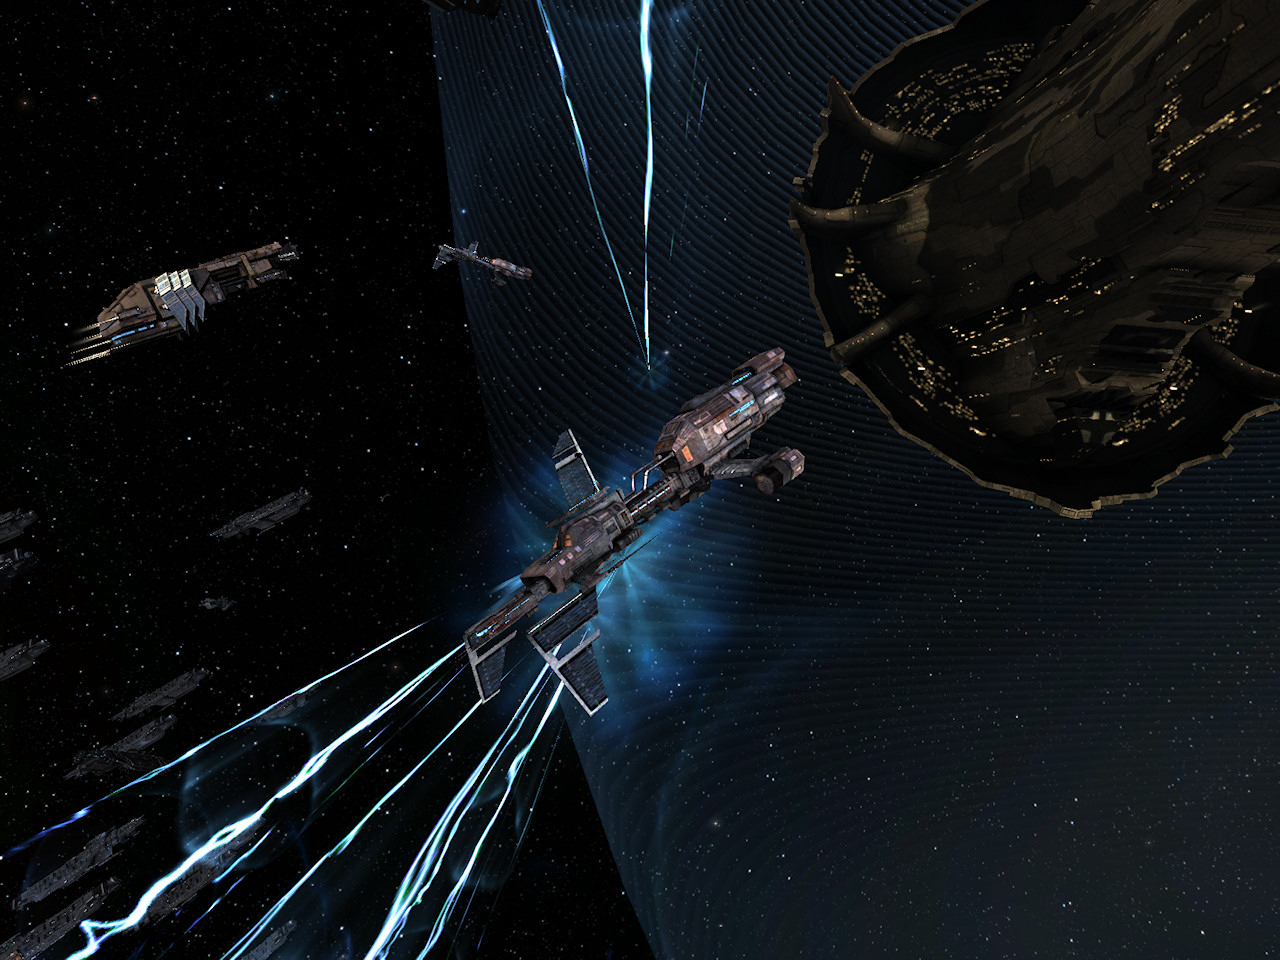
While there are in fact several ships that will often fill this role, the only ships with bonuses towards remote repping are Logistics ships and Carriers. Since Carriers can not use stargates to navigate systems but are reliant on other parties to provide jump portals for them (cyno bridging) the most often used ship for remote repping is the Logistics Cruisers.
Fleets that contain logistics ships will mostly adhere to buffer fit armor or shield doctrines and rely on Logi’s for their tanking ability. Since Logi’s tend to fit plenty of remote repping modules and capacitor transfer modules, the tanking ability of remote repped ships are usually a lot higher than self repaired tanks.
Usually you will also have chained Logi’s which means that the combined repair ability far outweighs most sustained damage while only massive alpha volleys will defeat ships that are sustained by logi pilots if the volleys fall inbetween repair cycles or before the logi pilots can respond to a repair request.
Meta Tanking
To avoid damage, or simply sustain more than zero hitpoints on your ship one can also refer to the art of meta tanking, or simply instigating a ship change on your opponent that disallows the opponent its damage dealing capacity or avoiding it altogether.
Methods include but are not limited to:
- Getting out of firing range of opponent
- Reducing opponents targetting range (by sensor dampening modules).
- Disrupting the effectiveness of the opponents weapon systems (turret tracking disruption).
- Jamming the target, making him unable to target anything (ecm warfare).
- Remove capacity from opponents capacitor in order to prevent weapon firing or other active modules that will either directly or as a derived effect cause damage to your ship (capacitor warfare).
EVE is a pretty dynamic game and you can develop a combination of methods that helps you increase survivability and become a nuisanse for your opponents in the process. The combination of modules, ship classes and your own imagination can provide you with plenty of exotic options which will help you win at EVE.


Recent Comments